
We’ve made transcribing your media easier than ever. So easy in fact, that you don’t even need to be logged into Designrr.
Simply drag and drop an audio or video file directly from your computer to your Dropbox shared folder and voila, the transcription begins automatically.
Looking for bulk imports…
Just add multiple files to the folder and each is cued, and the automated process begins.

Here’s how it works:
1. Login to Your Dropbox Account
If you don’t already have a Dropbox account, then start by registering for one. It’s FREE.
Dropbox is a great cloud-based service that allows you to store, share, and access your files from anywhere. And with the new integration to Designrr automated transcriptions.
Here is the link to sign up: Dropbox
Once there just click on the button that says, ‘Sign up for free’.
If you already have a Dropbox account, then go ahead and sign in.
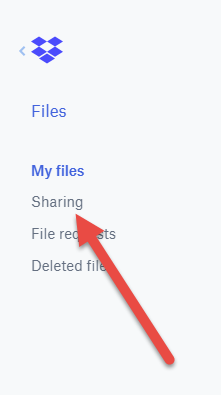
2. Create a Shared Folder for Designrr
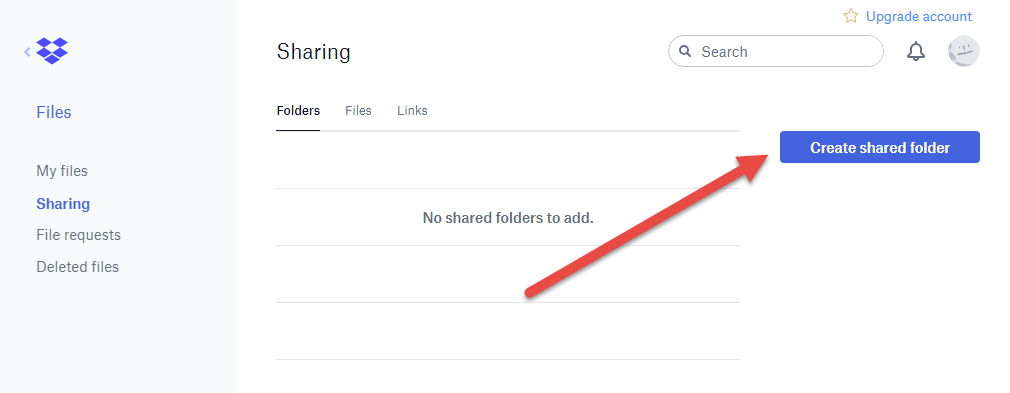
When you first log in to Dropbox you are taken to your main dashboard. Click on ‘Sharing’ in the left sidebar.
Next, click on the blue button that says, ‘Create shared folder’.
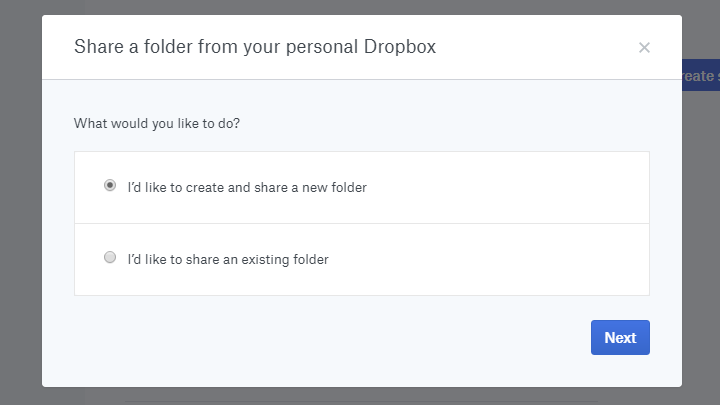
You have the option to share an existing folder, however, we do recommend that you create a new one with the name Designrr. This purely to keep things organized as there is no difference in how the technology itself works.
Make your selection now.
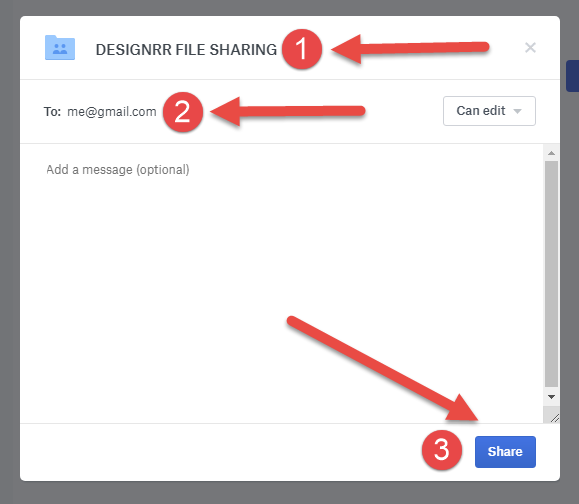
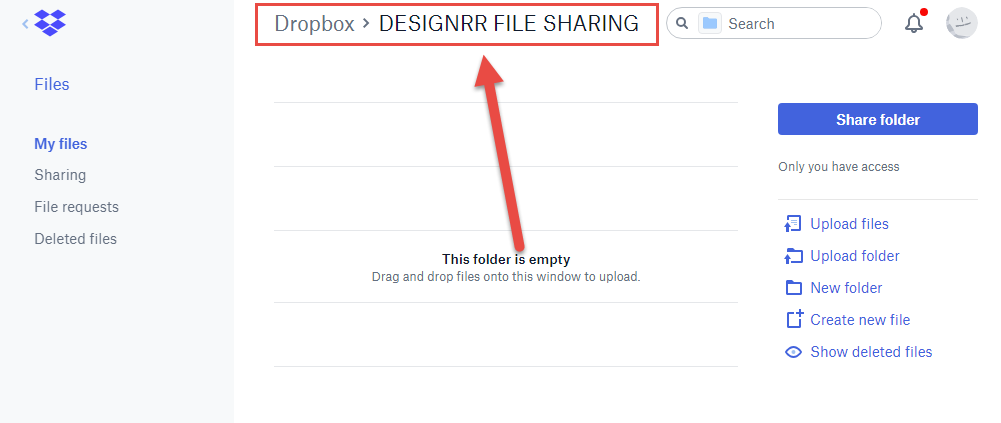
Next, name your folder. Some suggestions might be ‘Designrr Transcripts’ or ‘Designrr File Sharing’. However, the name itself is not that important rather that you remember which one of your folders is the one that you will sync with Designrr.
The next step is VERY important…
In the ‘To’ field add your email address connected with Designrr. It’s the same one as your username.
And lastly, click on the ‘Share’ button in the bottom right corner.
Your new folder will now appear in your dashboard. Simply double click on it to open it. To be sure that you are in the correct folder you will see the folder name at the top.
Your shared folder is now ready. Next, we need to connect Designrr to it.
3. Connecting Designrr to Dropbox
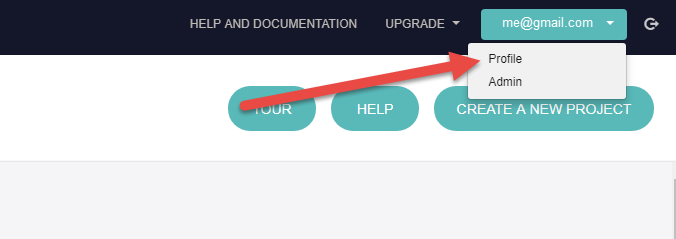
Login to Designrr and go to your ‘Profile’.
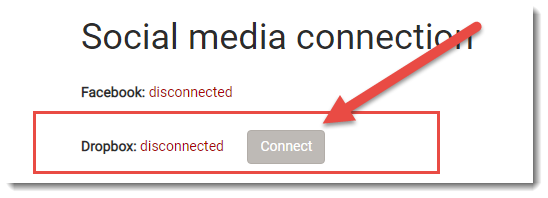
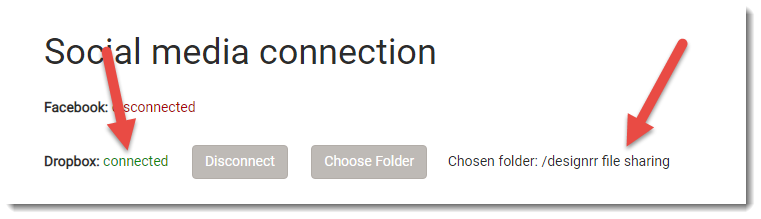
Scroll down to the ‘Social media connection’ section and click on the ‘Connect’ button beside Dropbox.
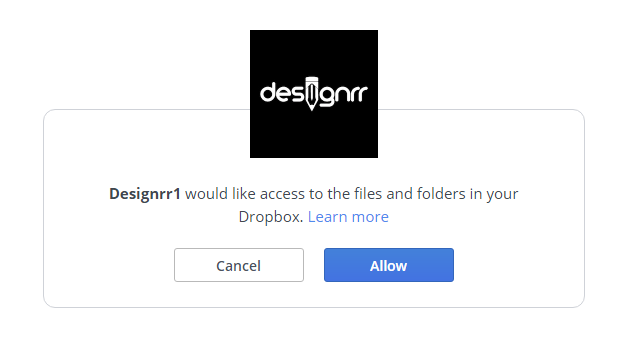
If you are logged into your Dropbox account, you will be prompted to give permission to Designrr to access your files. Click on ‘Allow’. If you are not logged in you will need to do that first.
Once the connection has been successfully establishing a popup will appear with your folders. Look for the new shared folder you created or choose the folder you want to connect.
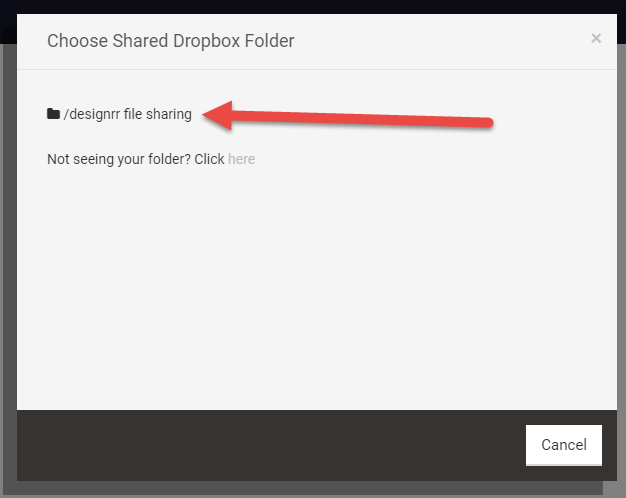
Click on the folder to complete the connection process. Now go back to the profile area and check to make sure that Dropbox is connected. You should now see the word ‘connected’ beside Dropbox, as well as, the name of the folder that you are sharing. You can also change the folder at any time by clicking on the ‘Choose Folder’ button.
4. Start Uploading Your Files
Now that Designrr and Dropbox have been connected you are ready to start uploading files. You have a few options on how to do this.
You can go back to your Dropbox dashboard and click on the ‘Upload Files’ icon. This will prompt a window to navigate your computer. Find the file you want to upload and select it.
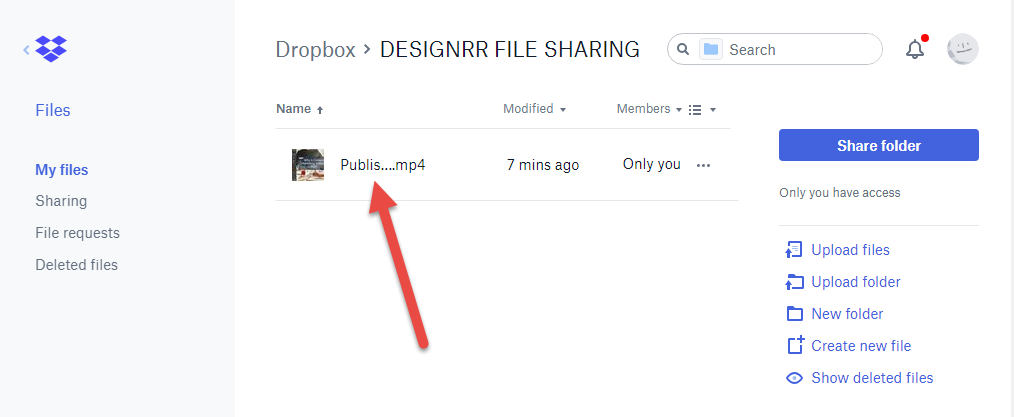
Alternatively, you can drag and drop a file into the folder itself with your Dropbox account open in your browser.
And lastly, the easiest way to add a file is directly from your computers file explorer. This means that you do not even have to log in to Dropbox. Find the Dropbox icon in the sidebar of your computer. Click on it and go to the shared folder you created. Now simply drag and drop any media there.
Once the file is in the shared folder the transcription begins automatically. You will receive an email notification that new media has been detected in your folder. A second email will be sent to you when the transcription is finished.
You do not need to remove the files once they have been transcribed. Our system will automatically detect when new media has been added. It will not produce a duplicate of files that have already been transcribed.
For bulk uploading, we recommend a maximum of five files per session. Each will be detected and cued in order.
In just minutes you will receive an email letting you know that your transcription is DONE!
The best part is that you don’t even have to be logged into either of the apps. Just drag the files on your computer to Dropbox and let Designrr do all the work for you. Then when you are ready to create your ebooks just log into Designrr and your transcription will be waiting for you.
If you liked this new feature then feel free to check out our latest features that have been upgraded into Designrr.
Create a Book from Facebook Posts
PDF to Flipbook Features, Templates and Search
