Imagine capturing the essence of a video without even having to hit the play button? In the age of information, accessibility and efficiency reign supreme.
YouTube, a platform reaching nearly every corner of the globe, is much more than a place to watch cat videos. It’s a global phenomenon, and ensuring your content reaches and resonates with its diverse audience is paramount. One often overlooked feature can significantly amplify your video’s reach and relevance: captions.
But why are captions such a game-changer, and how can you effectively implement them?
Dive into this comprehensive guide to understand the magic of captions on YouTube, the ways they can boost your video’s visibility, and step-by-step instructions to get you started. Let’s begin!
Can captions really have an impact?
YouTube is by far the most popular hub for viewing a large variety of videos online. Not only is YouTube the second most visited website in existence (behind only Facebook), but also only 15.8 percent of YouTube’s visitors are American. It has versions available in 91 different countries and in 80 different languages. which mean it reaches 95 percent of the internet, worldwide.
It is therefore imperative that your content is as accessible as possible. Adding captions to your video is an easy step you can take to reach some of the 360 million users who have hearing-related difficulties, for example, or who may only know your language as a second language who may prefer to have your content in written as well as audio form. Including captions also benefits your search engine rankings: closed captions can act as metadata for your channel, once your channel is verified. So what are captions and how can you make use of them?
Different types of captions
Captions are text overlays that help your viewers read what is being said in the video. Captions are technically different from subtitles, but the two terms are ostensibly interchangeable. (Subtitles are translated captions from either foreign language to English or vice versa.)
Captions can be one of two kinds. There are open captions, a fixed transcription embedded within the video that can’t be removed, or closed captions that can be turned on or off. YouTube uses a speech recognition AI to automatically transcribe captions for you. Captions are generated by AI so the quality of the captions is dependent on audio quality.
Why add captions and subtitles to your videos?

- More Views
SEO for the quick answer. SEO stands for Search Engine Optimization. SEO is used to strengthen the rankings of your videos in search engine returns. It translates caption as metadata and will make your videos more likely to show up in a Google search.
For example, let’s say someone is looking for “a Harry Potter and the Goblet of Fire book review” and in one of your videos, you review five different books, including this particular Harry Potter novel.
Unless your title includes the words “Harry Potter and the Goblet of Fire book review”, your video will not turn up in their search. If, however, you add open captions, every word you say in your video will be searchable on Google. Therefore, it is much more likely that yours would be among the search results.
- Reputation for accessibility
The beauty of the internet is its ability to reach any part of the world and help so many different kinds of people. With captions and/or subtitles, you can increase your impact to include deaf or non-English video watchers. There are even many native English speakers who prefer captions for their own reasons: maybe your accent is hard for them to decipher, or perhaps they are hard of hearing.
Including captions in your material puts you among the content providers who go that extra length to reach them. This is likely to engender trust and appreciation, and perhaps they will be more likely to become a subscriber or recommend your video content to a friend.
- Higher view time and engagements
YouTube reports that videos with closed caption options enjoy 12% more view time than those who do not. Some surveys suggest that there are people would have finished watching your video, but did not because there were no captions. There are so many situations in which it might be easier to absorb video content if the viewer can read the captions as well; it simply doesn’t make sense to remain outside of that pool.
Utilizing your own transcription files
If you want to take advantage of the free transcribed captions of YouTube then skip ahead.
However, it is also possible to control your own captioning. You can obtain a transcription of your video from automatic speech recognition software like Speech Notes or Dictation or our Dynamic video-to-text transcription. With innovations in speech recognition technology, you can also use our video transcription software if you are planning on repurposing your content to a blog post or add subtitles to YouTube videos.
With the transcription in hand, first, double-check that the audio and video are synchronized. Sometimes, the easiest way to do this is to use software to timecode for you.
Next, be sure your caption file is formatted in one of the following that YouTube supports:
- SubViewer (.sbv)
- SubRip (.srt)
- (These two are the most popular, and highly recommended for beginner transcribers)
- Mpsub(.mpsub), and
- Videotron Lambda (.cap).
How to upload transcription manually and add closed captions on YouTube

Here are the steps to add closed captions or subtitles to your YouTube videos
Step 1.
Log in to your YouTube account and go to YouTube Studio, found in the top right corner. Once redirected, click on the Videos tab. Use the Classic YouTube Studio version instead of the beta.
Step 2.
Select the video to which you want to add captions.
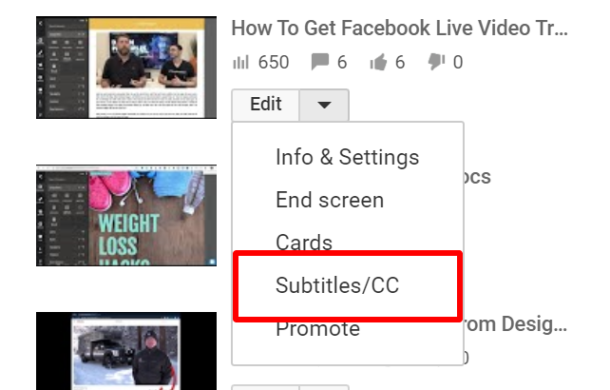
Step 3.
Select the subtitles/cc
You’ll need to set the video language to your preference:
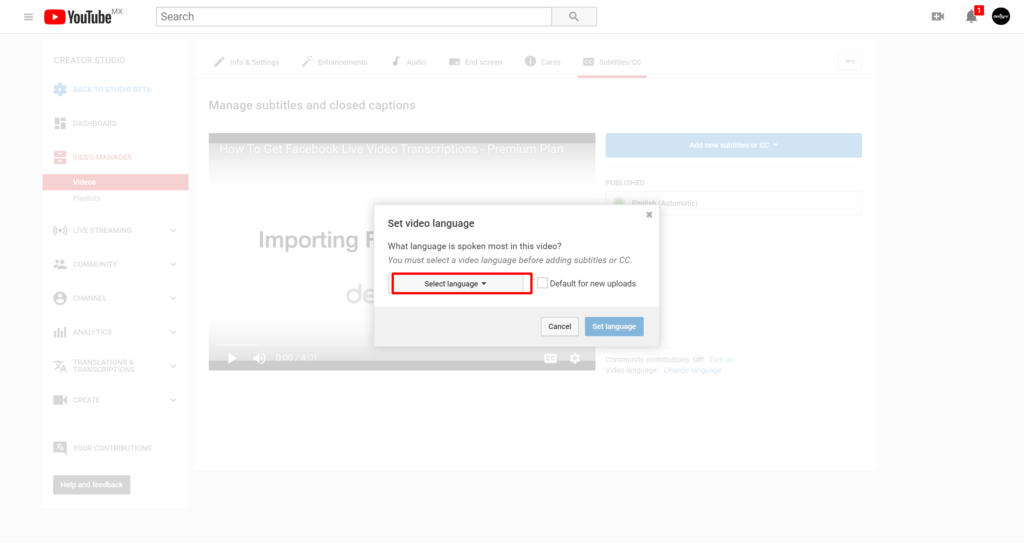
Step 4.
Click “Add new subtitles or CC” and select the language of your caption/subtitle: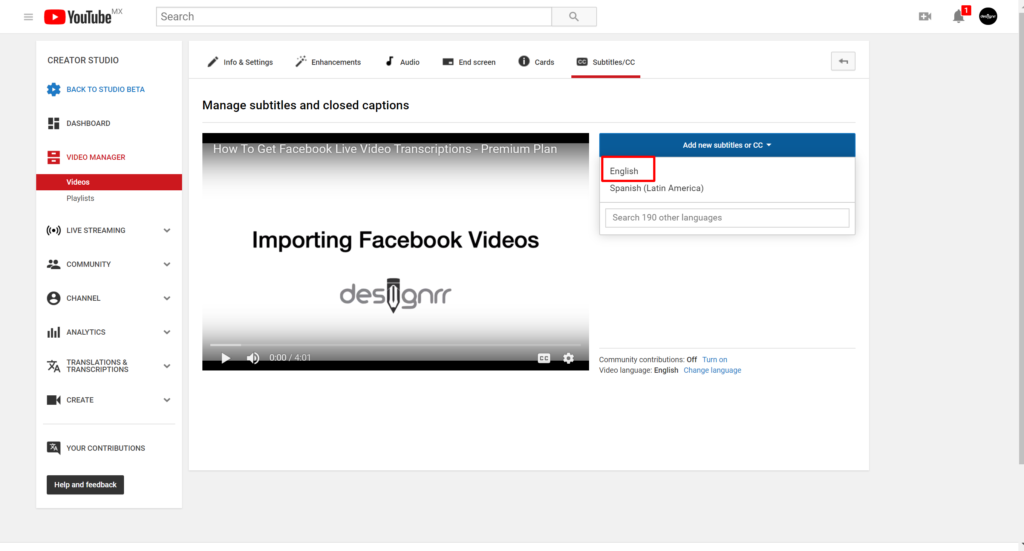
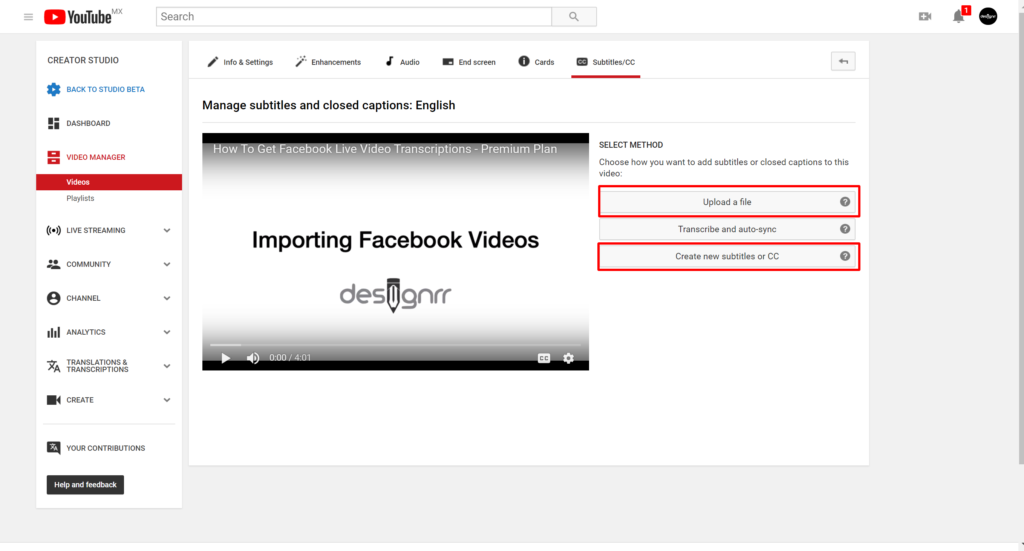
There are 3 options here:
- You can either upload your Designrr video transcription file. Which provides a better transcription accuracy compared to the auto-generated transcript from YouTube.
- Transcribe your video manually on YouTube
- Have YouTube create new subtitles or CC for you
Step 5.
Once you decide on the method, make the necessary changes, click Save.
There you go. your captions are now ready. All that’s left is to click on the CC icon at the bottom left of the video to gain access to the caption settings while viewing your video.
FREE transcription on YouTube
YouTube has its own built-in AI that captions your videos for free. However, it is not 100% accurate. Furthermore, it usually has poorly done line breaks, no speaker differentiation, and little or no punctuation.
That being said, you can troubleshoot most of these issues! This process is similar but different from uploading your own transcribed captions, so read carefully.
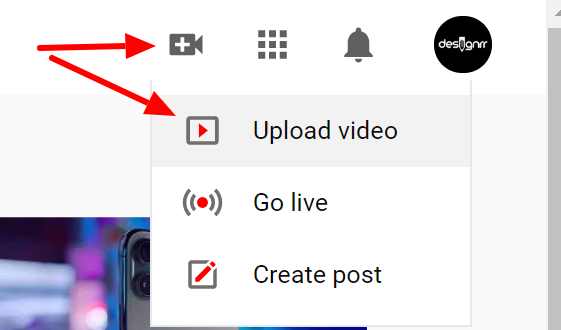
Step 1.
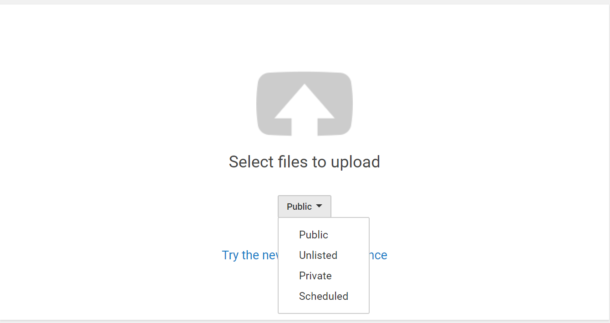
Find and click on the camera icon at the right top corner of the YouTube webpage and choose Upload Video.
Step 2.
Choose your listing preferences. There are three options – public, unlisted and private. A public video can be found via search engines and is viewable by the general internet public on your YouTube channel. Unlisted videos can be viewed by anyone with the link but won’t show up on your channel. A private video listing can only be viewed by you.
Upload your videos on YouTube as private or unlisted until captions and subtitles are added.
(Unlisted or private settings are also useful for when you plan to take the video down shortly, or if you are only there to take advantage of the free transcription service.)
As you upload, remember that the higher the audio quality you provide, the better the AI-generated transcription will be.
Step 3.
Once your video is uploaded, it is automatically added to YouTube’s transcription queue. The AI will automatically generate your captions, but this may take a day or two.
Step 4.
Go to the YouTube Studio and click Transcriptions.
![]()
Then select the video whose transcription you want to work on. You need to choose which language to have the captions in, and then you’re done. Your video already has a closed caption option ready for any kind of viewer.
![]()
Step 5.
To access and edit the closed captions, click on the Subtitles section. click the icon below.
![]()
Click “Edit on Classic Studio”. It will redirect you to another page with your video.
![]()
From there you can choose to edit or unpublish the captions. You can even download it under the Actions tab.

Step 6.
You can either edit your subtitles directly within YouTube or download it and edit in Notepad if you are on Windows OS or TextEdit on Mac. However, the edit features are still in beta mode and have a reputation for being clunky and not user-friendly. Most people prefer to edit outside YouTube.
Once you open text editor, start your editing to your hear’s content. Watch out that you never alter or erase the timestamp, unless you are intending to fix out of sync captions. Hopefully, you’ll only have a little bit of proofreading to do, such as title cases and punctuation.
Step 7.
It is now time to save and upload the file back to YouTube. On the same page where you downloaded your captions, find the Actions tab. Click on Upload File, then select your edited transcription file click on Upload.
Step 8.
Republish the video and remember to change the listing to the public!
In conclusion
There you have it, it was easy to learn how to add transcription to your YouTube video. There are many reasons why you need transcription, but the main point is to provide an accurate transcription. Whether you hire a professional transcriber, Do-it-yourself, use software or have YouTube generate it, accuracy is number one. So if you are looking for better results, try our video transcription software today to compare the level of accuracy and time saved from editing your caption/subtitles.