There are many flexible ways to make money online today. Transcribing is one guaranteed way to make extra income every day and increase your monthly earnings in your pajamas. But to make good money with minimal effort, you must be in a position to write quality transcripts. Only those transcripts that fully adhere to industry standards.
Going through various guidelines and following best practices can really help you polish your transcription skills with minimal effort. Consulting with others anytime you need support is also a brilliant idea. That being said, this article takes you step-by-step through the various ways you can optimize the transcription process. So, if you are finding it challenging to streamline the transcription process, then keep reading to learn more.
1. Prepare your tools and equipment

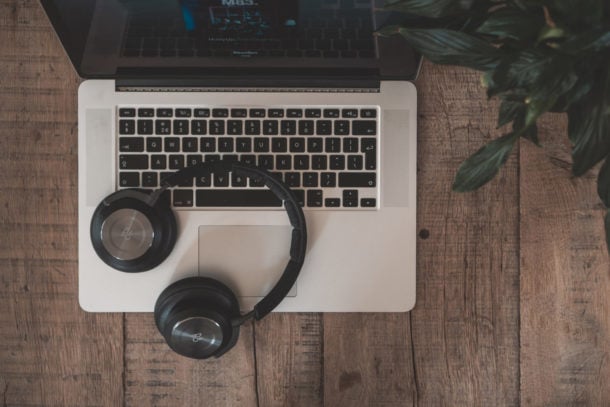
You need several tools to transcribe comfortably. For example, you need an ergonomic chair to support your lower back, facilitate proper blood circulation, and promote good posture. You also need quality, noise-canceling headphones. We recommend buying an over-ear headset. They are more comfortable and isolate distracting noise by encasing your entire ear.
Other items which you may need (some are optional) include:
- Eyeglasses (duh)
- A cup of coffee or tea
- A bottle of water
- An online reference (for example, Google or a dictionary on hand to search for unfamiliar terms quickly)
- Grammarly or other proofreading software
2. Find a good transcription software
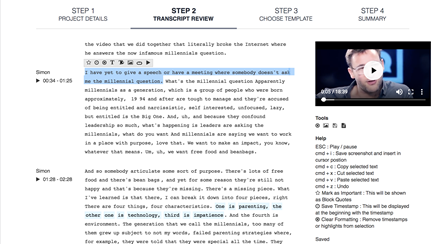
Before you buy those headsets to listen to the whole audio or video, think about how software can help you do more with your time. Today there are many transcription software to choose from, with some having a web-based option. The ideal software is the one that simplifies your work and is easy to use. For the best experience, consider picking a transcription software that automatically transcribes after you upload a file. A good example is Designrr (ours).
3. Amplify volume and increase the audio quality
There are times when you will come across files that have a lot of background noise and you may be required to amplify the audio quality. Software like Designrr comes in handy as it automatically increases the audio quality of your files for transcription by reducing the volume of unnecessary loud sounds and amplifies sections that are difficult to hear.
4. Familiarize yourself with the tools
There are no cutting corners if you want to use any transcription tool seamlessly. You have to familiarize yourself with all of the features and overall how the tools work. Fortunately, most transcription tools have reliable help documentation you can use to get started and reference anytime you need help.
The good thing is that it is easy to learn and master how to use most transcription software. If you are not sure which software is the easiest to use, consider trying a few, let’s say five before making a decision.
5. During transcription

You may be tempted to edit as you transcribe. While this is also possible, it is best first to transcribe and then edit later. Don’t worry about the first draft being imperfect. It is o.k. for the first few drafts to have some errors. So, whether manually or automatically transcribing, first focus on creating the initial draft.
Start by listening to the entire recording before doing anything else. Listening first can refresh your memory when you get into the editing portion. It is also good to have a sense of what the entire recording is all about. Additionally, listening helps you understand the flow of the conversation and the voices on the recording.
When listening, try to pause and slow down to better understand the recording. You can use foot pedals such as the Infinity pedal to start, pause and stop recordings.
If you come across unfamiliar words, leave a blank and continue to avoid breaking the flow. Once done transcribing, come back to those words you missed or avoided. Try rewinding and pausing until you get those terms right.
6. Edit the transcript

As mentioned above, editing after transcribing is a good practice. That way, you will have an easier time creating quality transcripts. Here are a few reasons why you may have to go back to polish your work:
- To format your transcripts to industry standards. For example, to add page number, title, etc.
- To identify nonverbal communication. For example, where people sighed or laughed, etc. If someone laughs after saying something, put “[laughing]” after what he or she said. For example, “My dog is so funny. [laughing]” is o.k.. Never add your interpretations to nonverbal communication.
- To correct misspelled words.
- To fix punctuation and formatting. You can find some proofreading softwares to help you transcript faster. Or review our proofreading tips to help you create clean transcripts.
- Work on those areas you left blank or missed.
- Fix misheard words, expressions, pauses, and words.
Style of transcription

Clean verbatim
Also known as non-verbatim or intelligent verbatim, is a lightly edited version of the original audio. During clean verbatim, the following are removed:
Most non-speech sounds, including coughing and throat clearing
- False starts
- Stutters
- Filler speech, including “um,” “uh,” etc.
True verbatim
This style of transcription attempts to capture every utterance of the speakers. These may include meaningless filler speech, false start, non-speech sounds, and stutters.
Note:
- Clean verbatim is often used because transcripts are easier to read and more affordable.
- On the other hand, true verbatim may be preferred for legal investigation where it is necessary to study what was said and the manner it was said in. True verbatim is also helpful for specific qualitative and market research projects.
Transcript format tips

Below are some of the common formatting elements used in most transcripts:
- Speaker labels: Often, speakers are identified by full name, first name, role, or title. Generic descriptors like, male and female can also be used.
- Sounds: Notate background sounds and non-speech in brackets. For example [door slams] or [laughing].
- Inaudible tags: For unclear words, mark them with a time-code. For example, [inaudible 00:30]. You can also add your guess [wing yard 00:30].
- Timestamps: For example, [01:30] can be placed at regular intervals. Let’s say after every 30 seconds or at the start or end of each speaker or paragraph.
- Crosstalk tags: In case two speakers are talking at the same time and it is impossible to comprehend what they are saying, use crosstalk tags. For instant, [crosstalk 01:30].
Conclusion
A transcript is an exact written record of the spoken words. Although sometimes it is not possible to transcribe every single word, always try your best to deliver a high quality transcript. Using transcription software can make your work easier and more enjoyable.
Need additional support to make your transcription process even easier? We are here to help.


